

In the previous post, Anatomy of a Cart: Part 1, we covered what characteristics to look for when searching for an optimal, mobile teaching cart. Today, we’re getting down into some more nitty-gritty details by discussing ways to creatively increase storage space on your cart. Being a music teacher on a cart means you essentially take your music classroom with you as you travel around the school building. If you’re going to have all of your needed teaching materials on hand, then you need to maximize ALL areas of your cart.

If you thought your only option was tossing your music teaching items on the cart’s shelves and rolling out, then read on, my friend, to find out some super strategic ways of storing your teaching tools and truly utilizing all of the space on your cart!
Stackable Bins

Let’s start with the most obvious storage solution: stackable bins. These are very efficient ways of storing small instruments. I personally prefer clear bins so I can easily see what instruments are inside, but I also have storage bins with patterns and holes cut out of the sides that allow me to see their contents. If you don’t have transparent storage bins, labels taped to the sides will eliminate the guesswork. If you don’t have time to design your own labels, there are a plethora of music educators on Teachers Pay Teachers that have created labels of various themes, colors, and patterns. Browse and find the perfect kind for you!
These storage bins are also helpful in that once you’ve finished a lesson unit that uses certain containers of instruments, you can easily transfer the bins from your cart back into a closet, stacking them up quite neatly until you need them again!
Small Containers
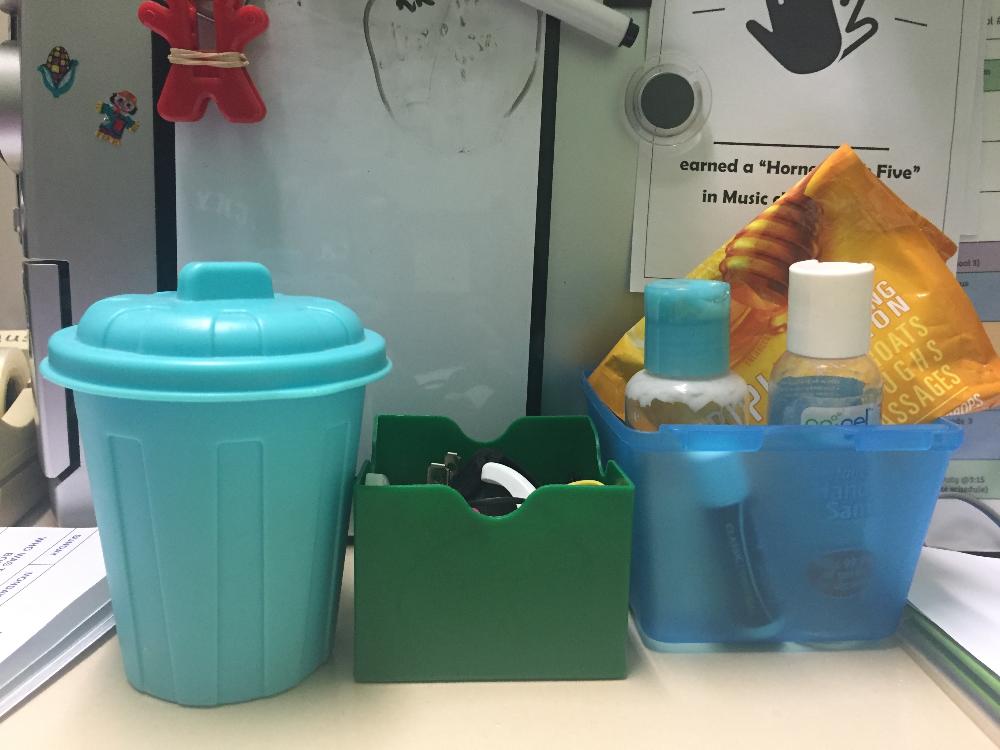
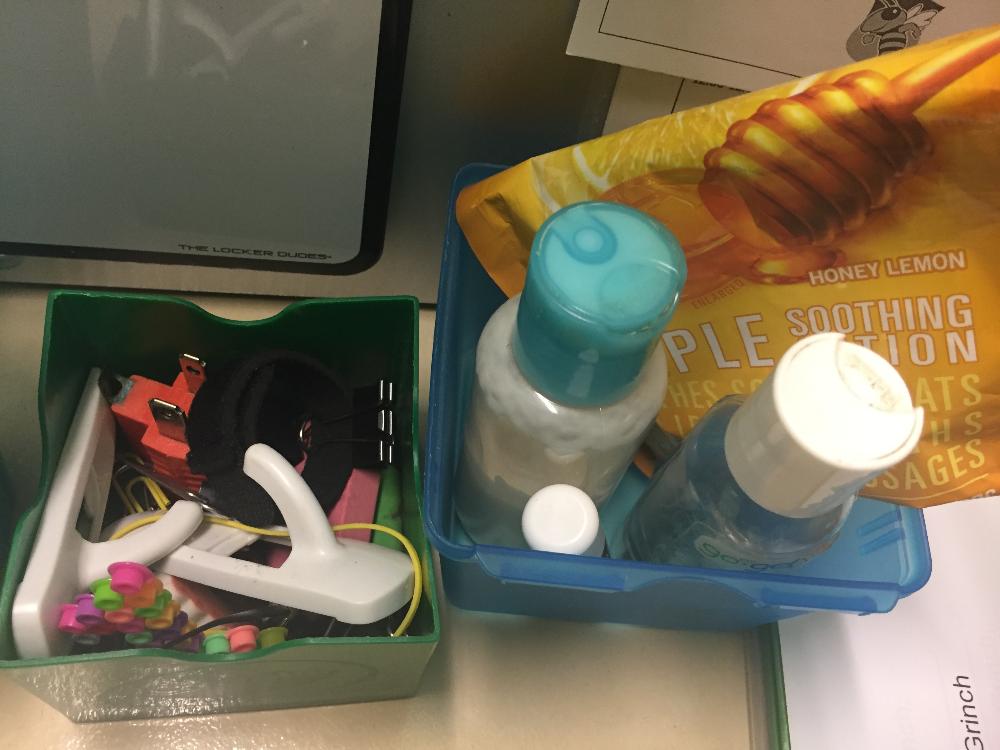
These smaller storage options are perfect for storing office items, such as binder clips, rubber bands, erasers, paper clips, and the like. As you can see, I like to also keep a container with my ‘must have’ personal items: cough drops, hand sanitizer, lotion, and lip balm. I keep these small containers on the very top tier of my cart since I utilize that area as my “desk on wheels.” This is super handy and practical, as it can be time consuming to search each classroom you teach in and attempt to find basic office products during a lesson. Storing your own stash on your cart allows you to have these items right at your fingertips.
Storage Pockets
Now let’s discuss some storage options for the exterior portion of your cart. Utilizing the outside areas was a concept that hadn’t occurred to me when I was initially placed on a cart, but after my first year of cart teaching, it became apparent that I needed to expand my cart's square footage. So I started with overhead projector pockets. Whoa, blast from the past...do you even remember those?
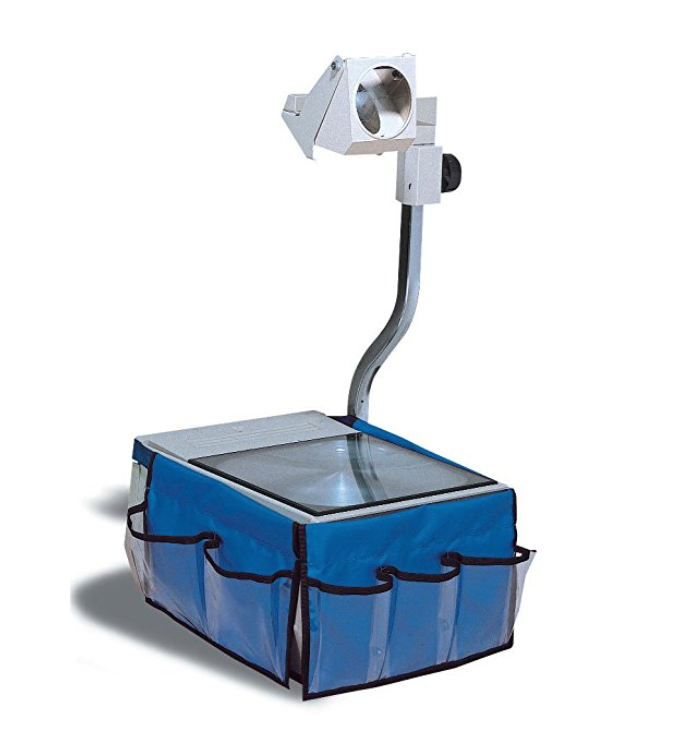
These multi-pocket holders come with a belt/strap that goes around the perimeter of the projector and would normally be used to hold dry erase markers, erasers, and other projector related materials. On my cart, these projector pockets store teaching items such as my “word wall” and vocal exploration cards, smaller picture cards, and bandages (the see-through pocket and low location on the cart allows students to quickly locate and grab them without my assistance).
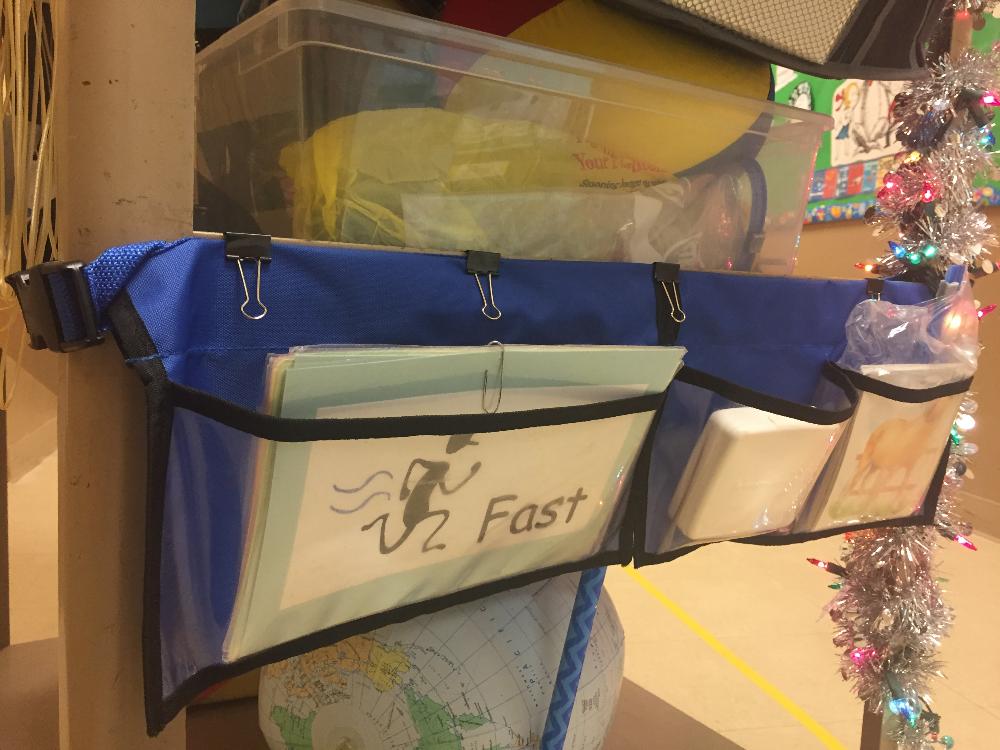
While the projector pockets were helpful, I soon realized that I needed more...something bigger and deeper that could hold items such as my clipboard, story books, and papers. Enter the Seat Sack! These chair pockets became all the rage a number of years back and when I commented to one teacher on how cool I thought they were, she gave me one of her extras! In order to attach it to my cart, I took the part that would slide onto the chair and cut along the sides to open it up to just a flap. I tucked this now open flap underneath the mat on the top of my cart, allowing the pocket part to dangle over the side and provide the perfect place for my larger, flatter teaching items. However, after using the projector pockets and chair pocket for a few years, I was still on the lookout for even more storage. On a trip to Bed, Bath, and Beyond, I found it...a car back seat organizer!
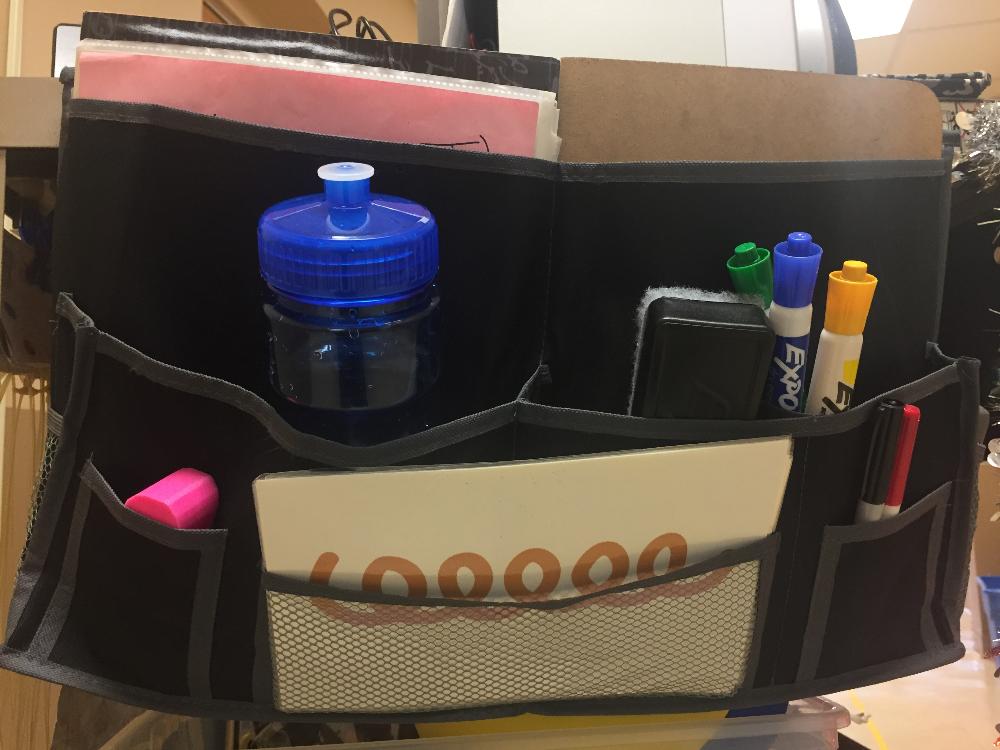
I immediately snatched it up along with this awesome organizational gem:
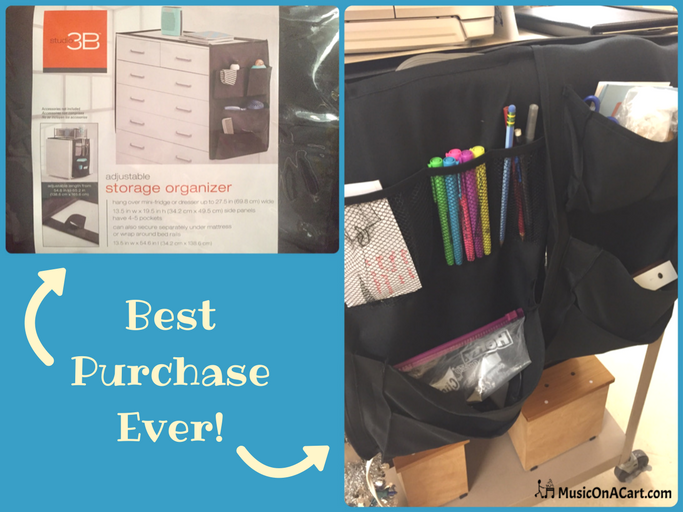
Initially made for college students to drape over their dresser or mini-fridge, this organizer was perfect for me to store my read-aloud books, papers, small posters, water bottles, miscellaneous small instruments (ex. slide whistle, harmonica, a recorder), pens, markers, wires, tissue boxes, and more! If you're unable to find these in stores, look online and use the search terms "car back seat organizer" or "mini fridge caddy" and that should turn up many options for you to look at and possibly order.
These organizers were my chosen method of increasing cart storage, but there are other creative external organizational items cart teachers can utilize. To discover additional ideas, feel free to browse through Music on a Cart's “Rock as you *ROLL*” and “Classroom organization” boards on Pinterest:
Even with all of these options, there’s still one more crucial cart area that many people tend to neglect. I’ll cover that in a future blog post, so stay tuned! Are there any organizational tools you've found helpful for your cart teaching situation that you currently use? Or did any of the above suggested items come as a surprise to you? Please let me know and share your thoughts in the comments below!
Encouraging you to rock as you roll,


Connect:


